Creating a Django Boilerplate!

In Information Technology, a boilerplate is a unit of writing that can be reused over and over without change. By extension, the idea is sometimes applied to reusable programming, as in “boilerplate code.”
So we are going to create a boilerplate code for Django which consists of 3 parts:
1.Setting up the Debug Toolbar
2. Setting up multiple settings modules
3. How to use python decouple
4. How to create custom Django commands
Part 1(Setting up the Debug Toolbar)
So starting with Django debug toolbar , The Django Debug Toolbar is a configurable set of panels that display various debug information about the current request/response and when clicked, display more details about the panel’s content.
The basics steps are to install Django and python ‘s latest versions. You can see that in my last story (https://medium.com/@shrey007/making-a-professional-portfolio-in-django-b6a98071c1c5)
Here we will name our project as demo. then we will head to the django debug toolbar’s documentation (https://django-debug-toolbar.readthedocs.io/en/latest/index.html) and start the installation process. So firstly
pip install django-debug-toolbarThen we will add 'django.contrib.staticfiles' and 'debug_toolbar' in the settings.py

Then we are going to add the static comands required for the project blow the STATIC_URL .
STATICFILES_DIRS = [os.path.join(BASE_DIR, 'static_files')]
STATIC_ROOT = os.path.join(BASE_DIR, 'static')
MEDIA_URL = '/media/'
MEDIA_ROOT = os.path.join(BASE_DIR, 'media')
Now adding the MIDDLEWARE which is required for the toolbar .The order of MIDDLEWARE is important. You should include the Debug Toolbar middleware as early as possible in the list. However, it must come after any other middleware that encodes the response’s content, such as GZipMiddleware. So we will add it at the top.
'debug_toolbar.middleware.DebugToolbarMiddleware',
Now open the urls.py folder and Add the Debug Toolbar’s URLs to your project’s URLconf as follows:
from django.conf import settings
from django.conf.urls import include, url
from django.urls import include, path

if settings.DEBUG:
    import debug_toolbar
    urlpatterns = [
        path('__debug__/', include(debug_toolbar.urls)),


    ] + urlpatterns
And then add some basic code to the views.py to just render the html page as follows:

Then add your local host ip to the ALLOWED_HOSTS generally it is ‘127.0.0.1’
ALLOWED_HOSTS=['127.0.0.1']Now moving towards the debug Toolbar settings.You can find the above process in the documentation under the installation section.Now go to the panels section from the left panel. It displays all the panel functions which can be added in it , we will be taking the default panel from the configuration section. we would be adding like show_toolbar which allows us to hide the toolbar and the intercept redirect.
DEBUG_TOOLBAR_PANELS = [
    'debug_toolbar.panels.versions.VersionsPanel',
    'debug_toolbar.panels.timer.TimerPanel',
    'debug_toolbar.panels.settings.SettingsPanel',
    'debug_toolbar.panels.headers.HeadersPanel',
    'debug_toolbar.panels.request.RequestPanel',
    'debug_toolbar.panels.sql.SQLPanel',
    'debug_toolbar.panels.staticfiles.StaticFilesPanel',
    'debug_toolbar.panels.templates.TemplatesPanel',
    'debug_toolbar.panels.cache.CachePanel',
    'debug_toolbar.panels.signals.SignalsPanel',
    'debug_toolbar.panels.logging.LoggingPanel',
    'debug_toolbar.panels.redirects.RedirectsPanel',
    'debug_toolbar.panels.profiling.ProfilingPanel',
]
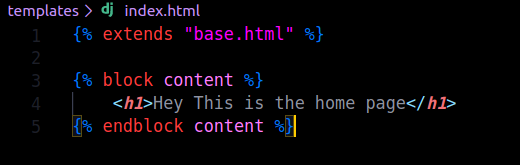
Now make a template folder and add the base.html and index.html which contains some basic code to display something on the website.

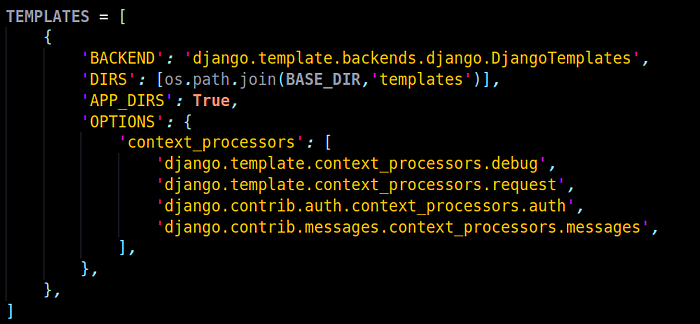
change the template settings in the settings.py as follow:
Ugh! finally now some basic commands for the display in the content and see the toolbar. and just make a static_files folder and leave it empty for now.
#For migrating
python manage.py migrate#For collecting static files
python manage.py collectstatic#For running the server
python manage.py runserver

Here is the folder structure for part 1

Hope you like this
